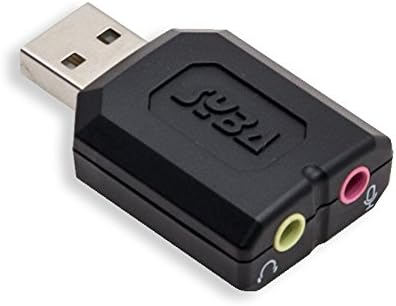
Syba external USB Stereo Sound Adapter
$7.49
$8.59
13% off
Reference Price
Condition: New
Color: Black
Top positive review
117 people found this helpful
Works great out of the box but it needs some tweaking to work right
By Honest Reviewer on Reviewed in the United States on July 15, 2011
EDIT: I recently bought 2 more of these. CablesOnline is selling the old version but Aston K is selling the newer version. Buy from Aston K to get the updated version! I notice a lot of people here on Amazon seem to be completely clueless when it comes to examining a product thoroughly and giving a detailed, unemotional review so here's something I hope is useful. The following was done with 3 different Windows 7 SP1 machines and nothing more. Recently, I lost my Audio Advantage Micro which I've been using for many years so I decided to buy a replacement. I was looking at Amazon and while I was leaning towards the Creative USB Go key but I couldn't help notice the very cheap Syba dongle with such glowing reviews. I decided to buy it since the total price was barely anything and if it sucked I'd just get the pricier one. I just got this little guy in today and it's definitely not the most sturdy built thing, but it was fine enough for every day use without breaking it. You'd have to be a complete moron to break this thing, really. The build quality is exaggerated by some people here. It's really just fine, even beyond the price you are paying for it. If you really are that paranoid about breaking it and have a tendency to do such thing, you could always just give it a good wrap with some electrical tape and add more protection that way. The two things I noticed people were complaining about were about how much it sticks out and the "annoying" light. Coming from the Audio Advantage Micro, this light is a very dim green that blinks when audio is being fed. I don't know about most people but my attention span is higher than that of a kitten so I was able to not be annoyed by it because there's a big bright screen in front of me, you know? Seriously though, it's not distracting unless you have some major ADHD. As for the shape, this dongle sticks out less than all of my USB keys and my AA Micro so its really not a problem. The only issue I can see being a problem is that the width of the dongle might block other ports. However, if you have a brain, you should be able to look at your ports and see if this will be a problem beforehand. Another thing I need to mention is that the chipset seems to be updated in recent models. It uses the CM-119 chipset according to the plastic container, and also, there seems to be a 3 year warranty on these little guys according to people on Newegg so if you have a problem, just email Syba support and they might be able to replace this easily if yours does go out. One final note: on Windows 7, I'm noticing that 12% seems to be the best volume level for headphones. I thought it would be 4% like some people said, but nope, 12% seems fine. So yeah, overall, this dongle is great for the price and I am enjoying it. I could have sunk a lot more into something else but this works fine. And now for some important notes: 1) Follow the directions. You have to connect both the microphone and headphones to the dongle before you plug it into your machine to get Windows to recognize the drivers and add those 2 outputs. You only need to do this the first time. If you screw this up, you need to go to Device Manager and uninstall the drivers, reboot and try again. 2) The microphone level is 0 by default for some reason. You have to raise it to get it to work. Go to Control Panel, Sound, then right click the Recording tab to see the USB Mic input. Right click it to get the properties page and look at the "Levels" tab. Adjust to your liking. Using the "Listen" tab to listen to yourself talking to get the right volume. 3) Again, if this thing shorts out on you. Email Syba and they will probably replace it for you. 4) You can achieve higher sound quality if you go the properties for BOTH the mic and headphone output and select 48000khz. 5) If sound effects are enabled in those properties pages. Disable them. You don't need them. Your voice will sound clearer without them.
Top critical review
1 people found this helpful
Problems with microphone input. Solved, but should not have been.
By Baddie Baddie Two Shoes on Reviewed in the United States on February 21, 2015
I ran into problems with this and the Audio-Technica lavalier battery powered mono microphone. The microphone works great on my other laptop (with microphone input), and all of the desktop computers I plug it into, I believe the problem to be with the jacks design on the unit. You are responsible for your own self and your own property and modifying anything is always a risk. Skip to the bottom if you are in a hurry to try one of the fixes I tested at your own risk. I suppose just plugging in made in china junk is a risk too though. The microphone input is a stereo jack, unknown if it leads to mono input on the chip circuitry as I don't have a stereo microphone to test it. I have taken the unit apart so I have seen the stereo jack. (I have a degree in Electronic Engineering so I know a stereo jack when I see one) When I plugged in mylavalier microphone all the way it would not work. If I unplugged it a little bit (2mm or so) it worked (when it was making contact with the left and right positive input and no contact on the common input). When the plug was it all the was jack was making contact with the common and the positive input on the common part of the microphone plug. So the reason I had to open the unit up is to take the stereo positive input closest to the common out of the equation (bent it so it would no longer make contact) and now my mono microphone works fine in this unit because the common is making contact with the common and one input is making contact with the positive while the other input is rendered removed. At first I used a spacer made up of think cardboard or something to prevent the microphone from going all the way into the jack but seeing how the microphone works great on my other laptop (with microphone input), and all of the desktop computers I plug it into, I believe the problem to be with the jacks design inside the unit and I don't want to mess around with removing and storing a tiny spacer when I move my microphone from computer to computer. Gently unplug the microphone about 2mm. Does it work now? Try setting the level and selecting it as default input in your OS. (search Google for HOW TO SET UP A MICROPHONE WINDOWS and find a tutorial that matches your version or replace the word windows if you are using a different OS). If you have verified you mic to work when unplugged slightly but not to work when plugged in all the way then you may want to try the methods below at your own risk. I was able to solve the problem of the microphone not working if plugged in all the way by using one of the following methods: Method 1) Make a spacer to go onto your microphone plug and prevent the microphone from plugging in all the way. I use automotive rubber hose to make electrical insulating spacers on my projects. This would work well in the washer "fluid size" maybe smaller. You could also use a piece of cardboard or something of the correct thickness and make a hole in the middle to insert the plug into. Whatever you use it needs a hole of about 3.5mm in the middle and to be around 2mm thick so that you can insert the plug through the hole and then plug the microphone into the jack. Be careful because with this method a gentle tug of the cord can easily unplug the microphone. Method 2)This method makes a more secure fit and prevents accidental unplugging of the microphone due to gentle tugging of the cord. I took the USB sound card case apart without breaking it. Difficulty level here is extremely high if you do not own specialty tools for such tasks. Even with specialty tools it was difficult and I broke two of the retaining tabs. Please note that in addition to the tabs permanent hardening adhesive is also used to seal the case. I then looked at the pink microphone jack and noted three metal tabs that make connection to the microphone plug. Using a micro pry bar (think precision flat bladed screwdriver) I bent the tab in the middle upward. I then inserted the mic plug and confermed it no longer made electrical contact. I then sealed the case with 2 part hardening epoxy.
Sort by:
Filter by:
By -
Verified Amazon Purchase
Vine Customer Review of Free Product
Sorry, no reviews match your current selections.
Try clearing or changing some filters.Show all reviews
Show more reviews